


Hello everyone! It’s been a while, and I’m so excited to be back. Life got crazy for a while there (you know how it goes), but now I’ve settled into a rhythm. I’ve been doing so much cooking and experimenting in the kitchen that I just couldn’t stand not sharing anymore.
If today’s recipe sounds complicated and/or scary, fear not. It’s amazingly simple and I’ve made them three times now. They’re worth the work every. single. time.
Jay and I spent a lot of time trying to find tortillas that weren’t full of, you know, everything under the sun. To give you an example, one of the brands that we see at our local grocery store contains the following (massive) list of ingredients: (Note, these are listed under the “Better-For-You” section of their website. Yikes.)
Whole wheat flour, water, vegetable shortening (interesterified soybean oil, hydrogenated soybean oil and/or palm oil), contains 2% or less of: leavening (sodium bicarbonate, sodium aluminum sulfate, corn starch, monocalcium phosphate and/or sodium acid pyrophosphate, calcium sulfate), sugar, salt, preservatives (calcium propionate, sorbic acid and/or citric acid), cellulose gum, distilled monoglycerides, enzymes, wheat starch, calcium carbonate, antioxidants (tocopherols, ascorbic acid), dough conditioners (fumaric acid, sodium metabisulfite and/or mono- and diglycerides).
The recipe I’m going to share with you (from 100 Days of Real Food)? Four ingredients. If you count tap water. Full disclosure though: This dough recipe is so good, I haven’t changed a thing. I’m not even going to give you a recipe (not on this site, anyway). Oops. But I am going to give you a new way to cook the tortillas— by broiling them instead of frying them! There might be something like this in some corner of the internet… but I haven’t been able to find it. I wanted to find a quicker, lower-fat method for cooking this delicious dough that wouldn’t risk setting off the building fire alarm. Again. *ahem*
Moving on! First, make your dough by following this amazing recipe. Then come back here, okay?
Are you back? Great.
I start by taking the freshly made dough (since you use warm water, it’s comfortably warm in your hands– so great on a chilly fall day), and rolling into a long log on a cutting board. I use a sharp knife to cut the dough in half, in half again, and so on until I have about a dozen similarly-sized pieces.
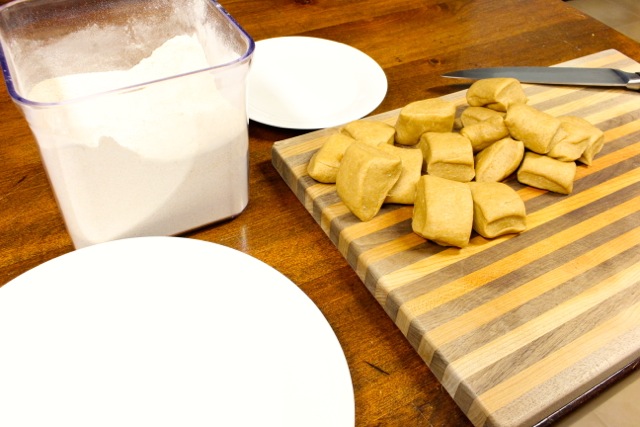
Next, with lightly floured hands, I roll these pieces into balls and stack them on a plate to free up the cutting board for rolling. Now’s the time you’ll want to move an oven rack to the top 1/3 of your oven and turn on your broiler to preheat.

 I lightly flour the cutting board surface, and use a floured rolling pin to roll the balls flat. Since my cutting board is conveniently striped, I roll until I can just see the pattern through the dough. Also, I find it helps to flip the dough over a couple of times throughout rolling.

 As you can see, I stack them on an extra plate as I’m working. The original recipe suggests letting them rest for 15 minutes after rolling. I find that by the time I’m done, the first ones have been sitting for about that long, and can be cooked right away.


Once they’re all rolled out, you can try out my take on cooking them! But first, let’s talk about why:
Pros to broiling instead of frying:
– Quicker than frying one tortilla at a time (since my cast-iron skillet can only hold one).
– Less smoke. (Both olive oil and butter tend to smoke in my apartment, even at the ideal cooking temperature for the tortillas.)
– Less oil/ butter! Instead of adding pats of butter to the pan or a few glugs of olive oil in between each few tortillas, you can cook them on their own. (I know increasing evidence shows that butter is good for you, and we use a LOT of butter in our home, but that doesn’t mean slathering it over everything. ;))
Cons to the broiling method:
– The tortillas can be slightly less pliable, since you’re not keeping them oiled up during cooking
– This method requires a little more attention to time– you’ve got to be quick!
Now that you’ve been educated on the pluses and minuses, let’s do this. Ready?
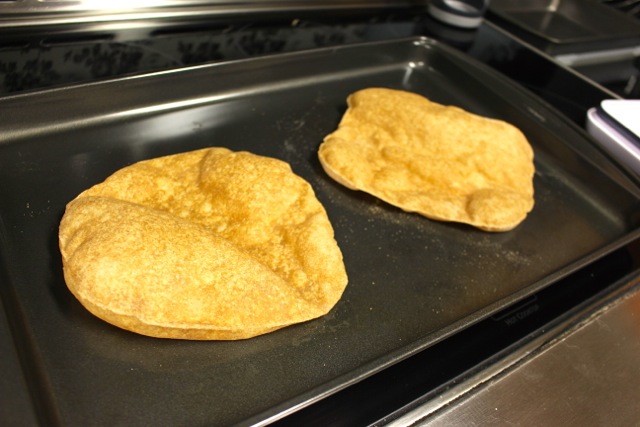
Place two tortillas side-by-side on a large cookie sheet. Stick them into the oven (on that upper rack you placed), and turn on the oven light so you can see them with the door closed.
You want them to just puff up, but not start browning. (If they brown, they get crunchy.) They should look like this:
 Once they’ve puffed, I pulled them out and used a spatula to flip them over before putting them back. You want to cook until the opposite side has just puffed up, too. This will probably vary based on your oven/ how thinly you rolled the tortillas, but for my setup, it took about 30-40 seconds on the top, and 15ish seconds on the bottom. I repeated this for all of the torillas… some did get a bit more crunchy than others.
When they were all done, I put a damp paper towel over the whole stack, and microwaved them for 15 seconds on normal power, to soften any super crunchy bits.

Now let’s compare: The tortilla on the left was cooked under the broiler, while the one on the right was fried with a smidge of olive oil in a cast iron skillet. You can tell that the one on the right is darker (oil-saturated), and I can tell you that it’s slightly more pliable. There wasn’t much of a taste difference between the two, with the exception that the one on the right was a bit more oily (of course).
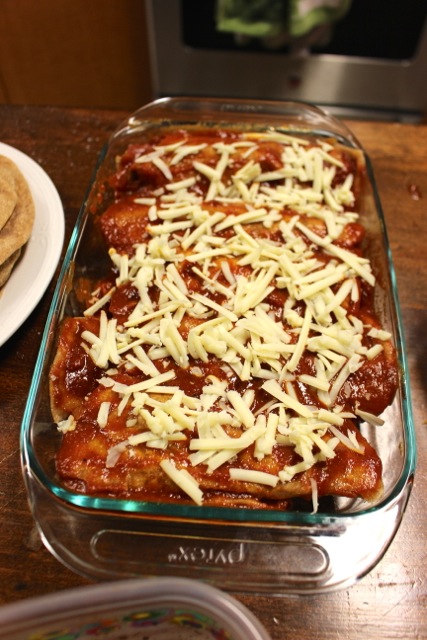
 These beauties were slated for some butternut squash enchiladas, with black beans and sauteed onions. I didn’t make my own sauce this time, but it’s on my list of skills to acquire soon…


 Yum!
Yum!
Thanks for reading, and I hope you come back again soon!
– Kaitlin
![]()
